


Sometimes I go a bit overboard with the lighting and shadows in my illustrations. Instead of sitting at my desk trying to guess what the image should look like, I’ve found it’s often faster and more accurate to build a maquette and light it up in real life.
It sounds like extra work, but in many cases it saves me hours or even days. It always leads to better, more convincing images.
In this post I’ll show a few maquettes I’ve built for different books, and the artistic challenges that each one helped me solve.
1. A posable helper for JUMPER
Build once, reuse again and again
One of the most useful and detailed models I’ve made (and the one that still lives by my desk) is this posable jumping spider. Because Jumper appeared in almost every scene of my book, it was well worth the time to make a large-scale detailed model of her that I could reuse in various perspectives.
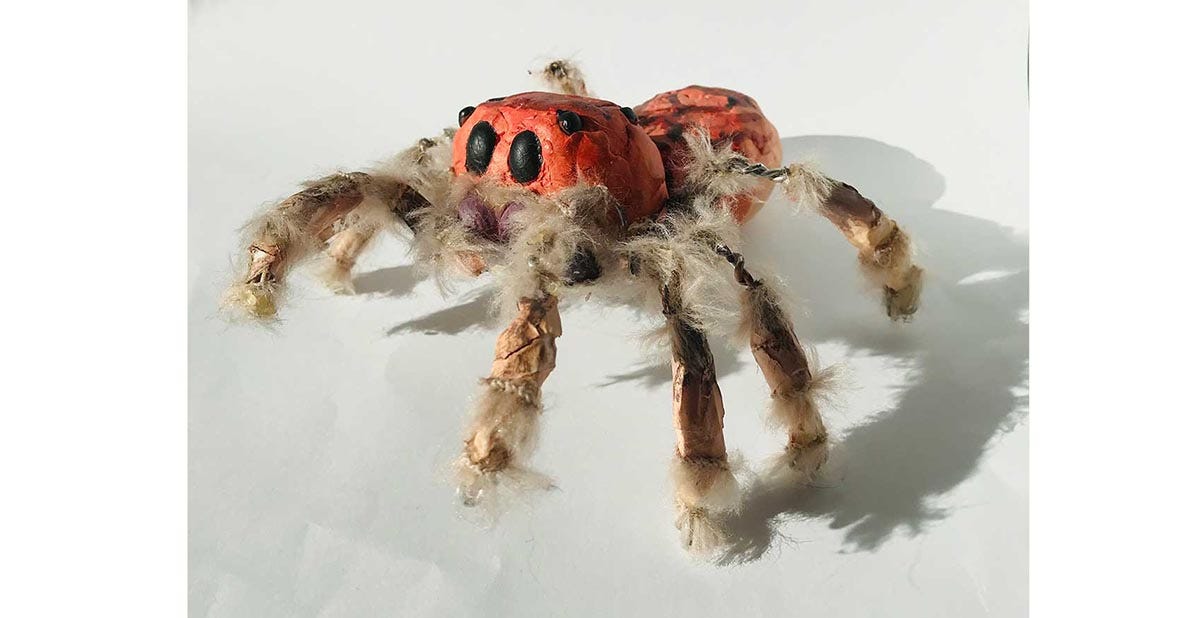
To build Jumper I twisted together a wire frame with eight legs and bulked up the two body sections with aluminum foil. I finished the surface with Sculpey and set black beans into the face to serve as eyes.
Once baked, it was time for the finishing touches. I thickened the legs with masking tape and glued on bits of fuzzy yarn. For the jaws I glued on pistachio shells painted with nail polish. I painted the body to match the spider species I was going for, and voilá, Jumper was done!
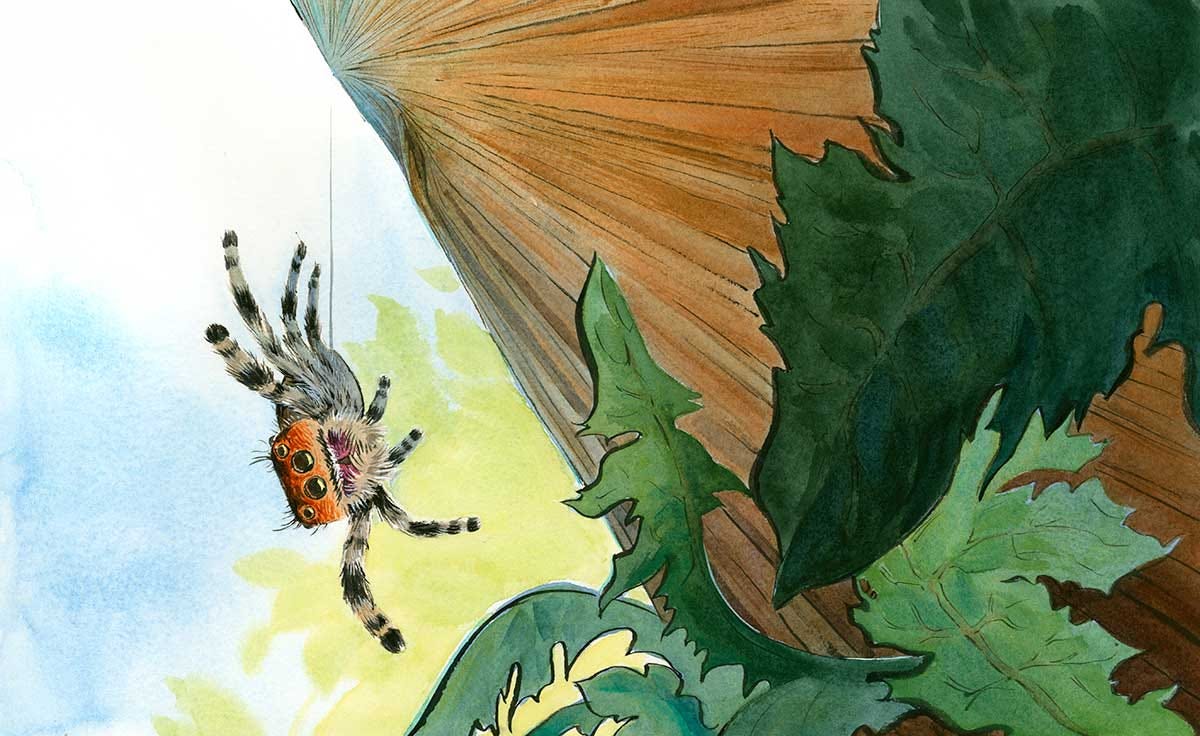
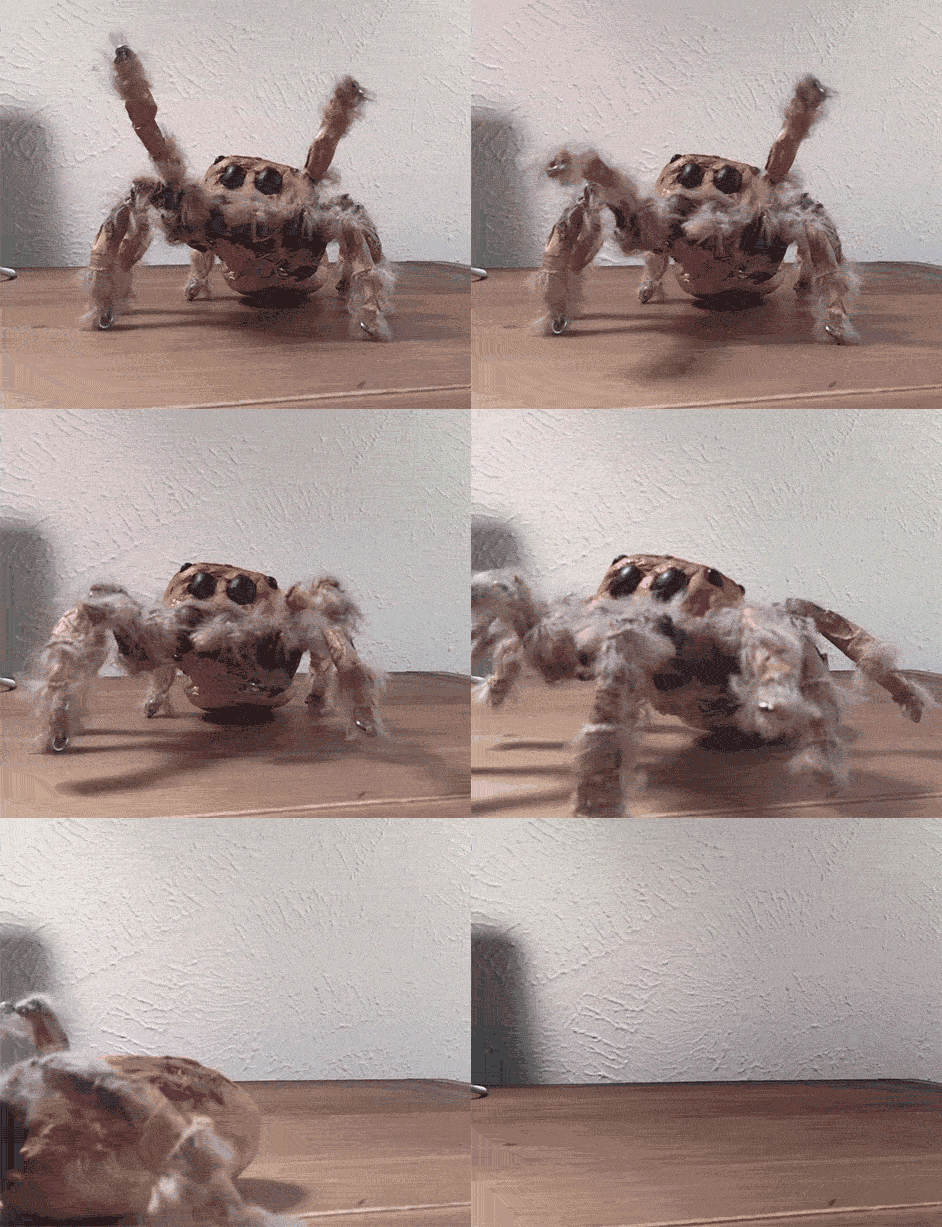
One of my favorite parts of making a maquette is being creative with the materials. It’s a great way to bring a sense of play into the work. I had a ton of fun making this maquette, but more importantly, it made the work better. With a movable character model that could rotate and pose I got to know Jumper’s form in a deeper way.
2. Simple architecture in THE LOST PACKAGE
Focus on the problem you’d like to solve
This book showed a wide variety of settings, including architectural details and interior scenes. I knew I wouldn’t be able to build everything, so I focused on the scenes that had the most challenging lighting situations. Each maquette I chose to build was designed to solve a specific illustration problem.
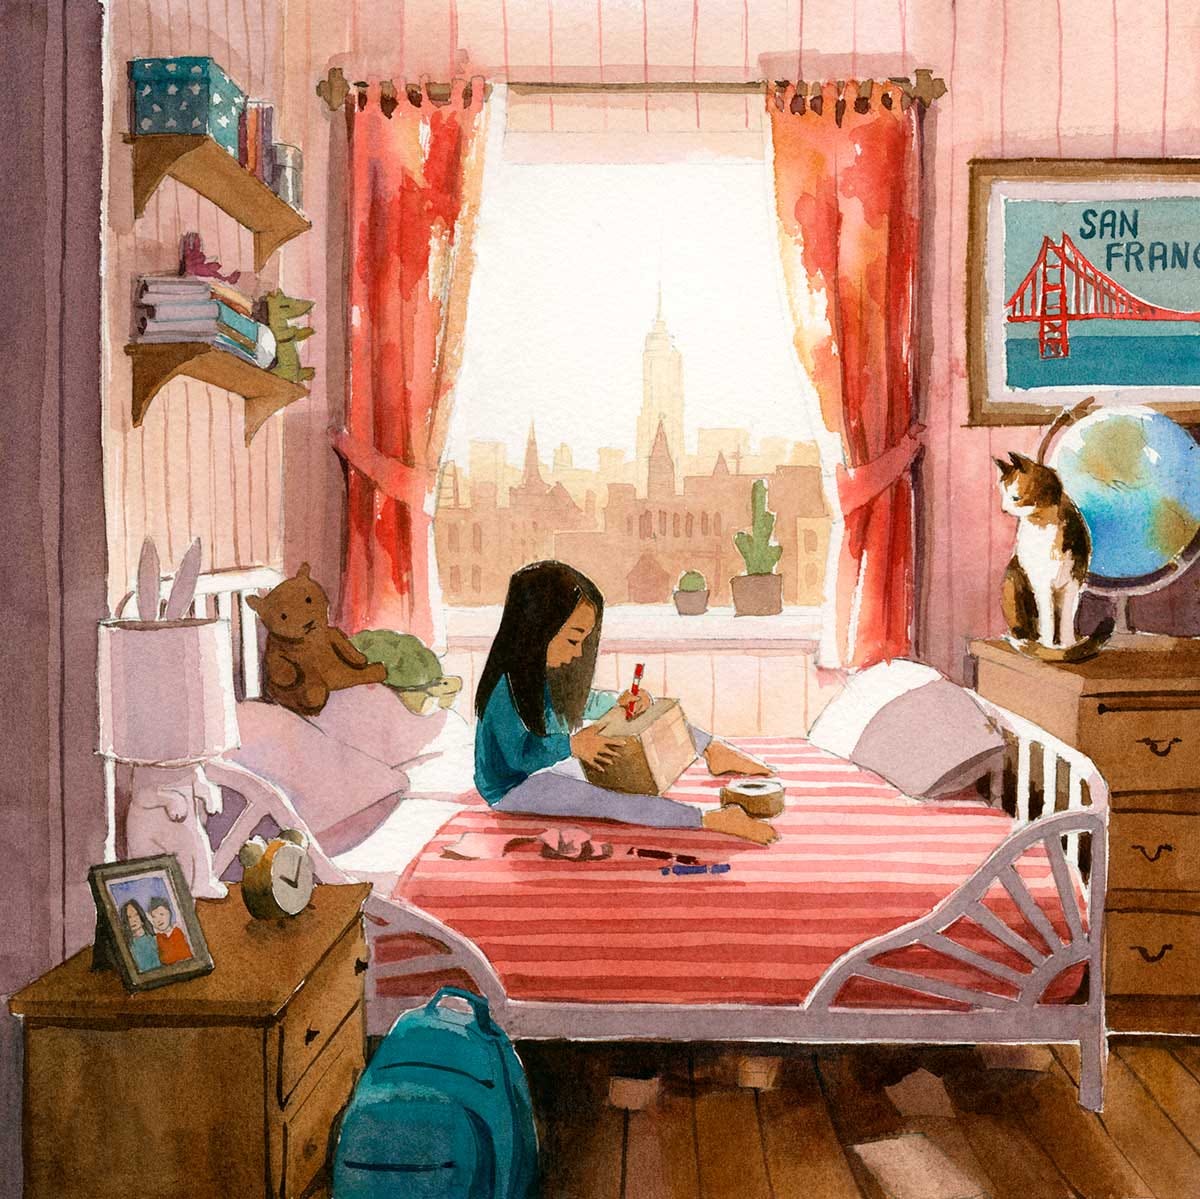
The first space I tackled was a bedroom. I had a vision of a sunny window, a city view, and a cheerful, colorful kid’s room.
I knew that light would reflect in an interior space. How would the room look with all that color bouncing around?
To get a sense of the lighting, I took a small cardboard box from my recycling bin, and cut a hole in the side to serve as a window. I made makeshift furniture out of paper and card stock and painted the space white so I wouldn’t be thrown off by the brown.
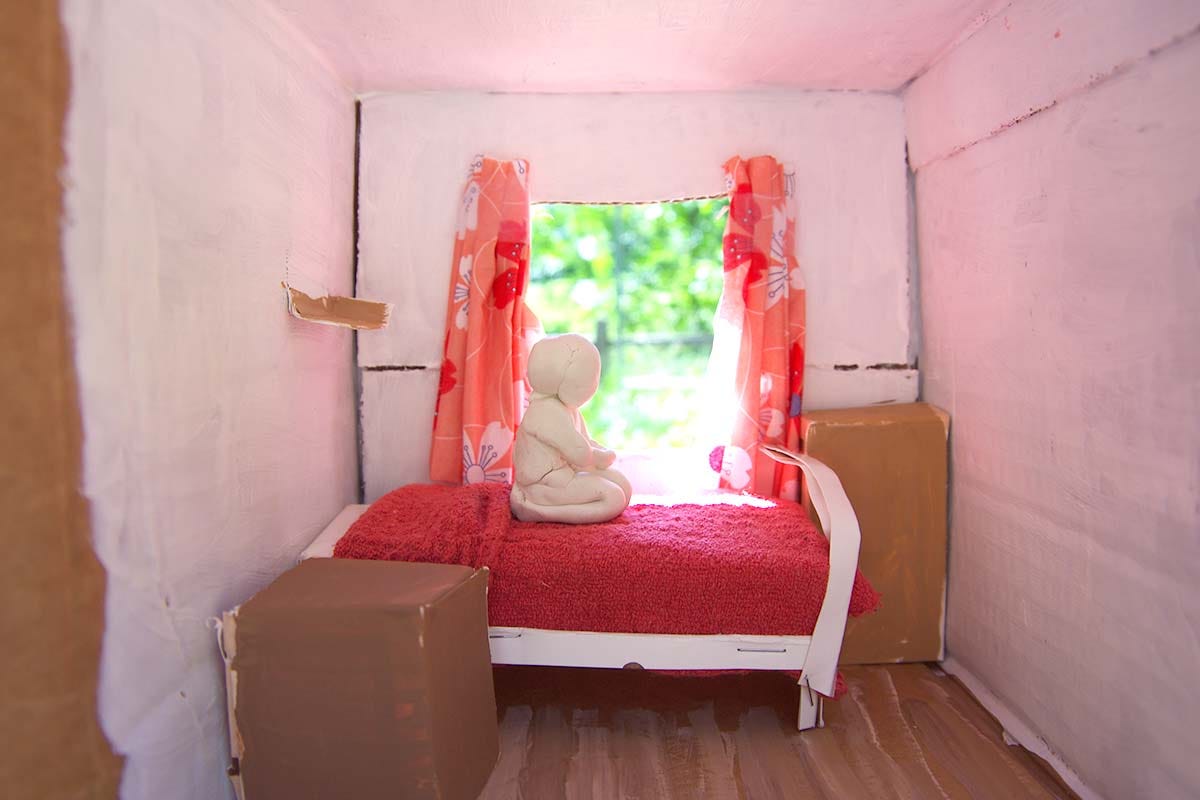
A pink cocktail napkin stood in nicely for curtains, and a scrap of fabric served as a bedspread. Sure enough, when I put my model in the sun the box glowed pink. With a small figure made out of modeling clay, I was ready to take a few reference photos.
A complex doorway scene involved a bit more effort. With stairs and pillars I knew the shadows would be tricky. This time I built a sturdier maquette out of foam core and hot glue, and raided my bathroom to make some “people” out of q-tips, gauze and athletic tape. To ensure that the light felt like crisp sunlight, I photographed the model outdoors.
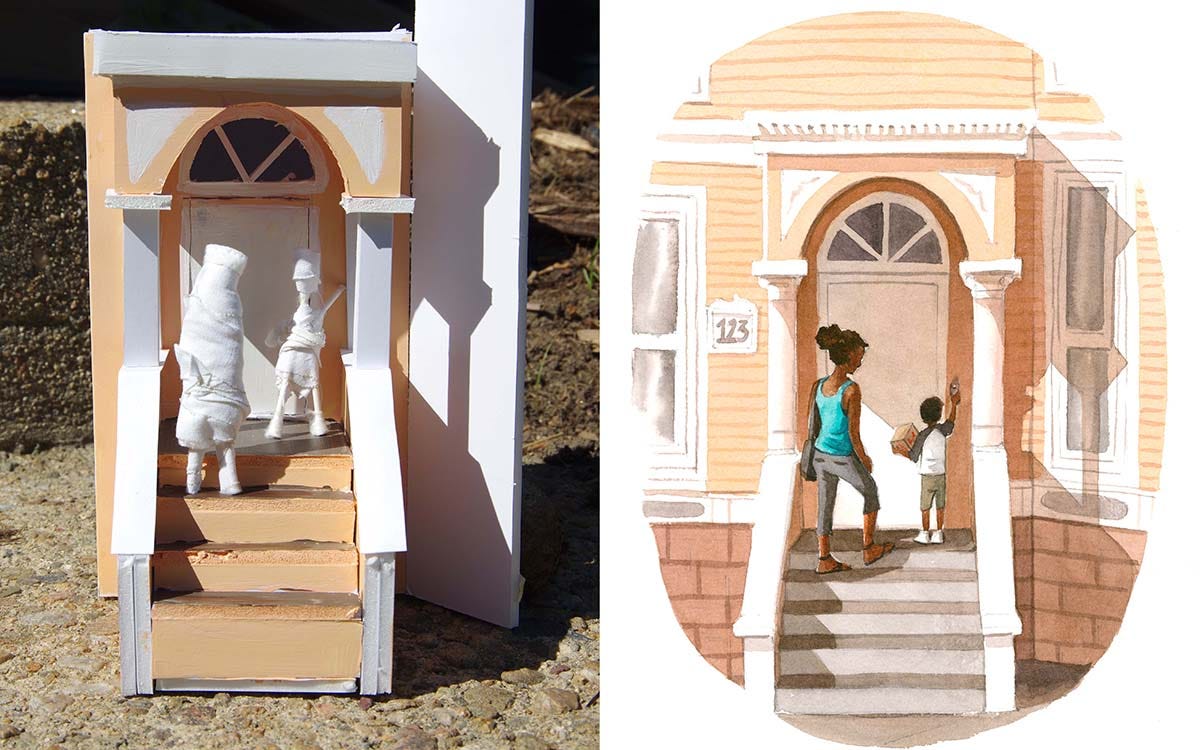
Maquettes can be very simple or detailed and complex. It pays to take a moment to consider what problem you need to solve. You can build just what you need to get the answer you’re looking for.
3. Letting the sculpture lead in I’M A BLACK HOLE
A model to generate ideas
Not every maquette has to be about solving a problem. Sometimes they can help you discover something new.
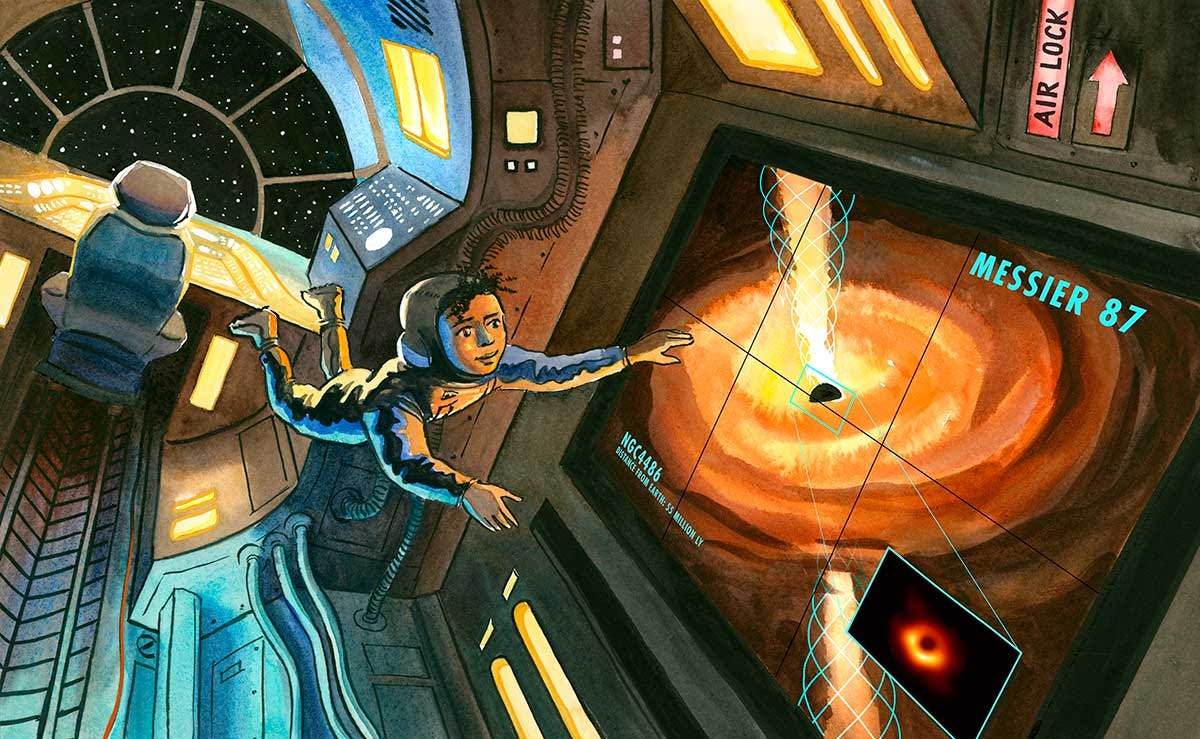
For this book, I wanted to create my own spaceship that felt different from the existing science fiction tropes out there. Could the model-building process itself inspire me to come up with new ideas? Without any real plan, I started cutting bits of foam core and cardboard and gluing things together.
As I worked, the form evolved, and shapes I may not have have thought to draw started to emerge simply because of how the materials behaved in 3D. Being able to move the model around in space helped me think of how a spaceship might actually feel if someone were in zero gravity. There wouldn’t really be a difference between a ceiling and a floor.
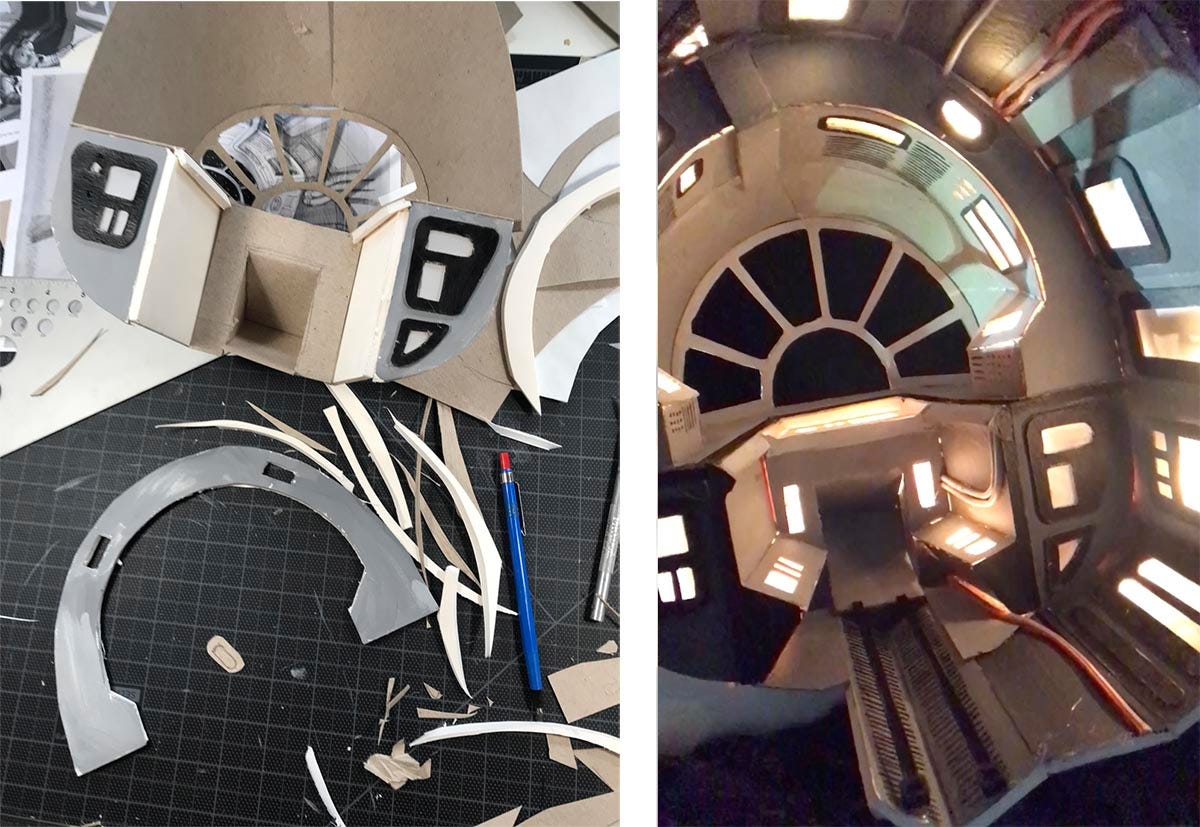
As I built, I was inspired to add details like conduits, vents, and glowing control panels. The space started to feel more realistic. A string of holiday lights brought it all to life.
BONUS: Possibly the laziest maquette ever
When my eight-year-old daughter saw this maquette that I built for my upcoming book, THE CRYSTAL ROOM, she burst into laughter and said “wow, mama, that looks terrible.”
Fair.
I needed to figure out some complex shadows, but I had a lot to get through that day, and I didn’t have time to build something elaborate.
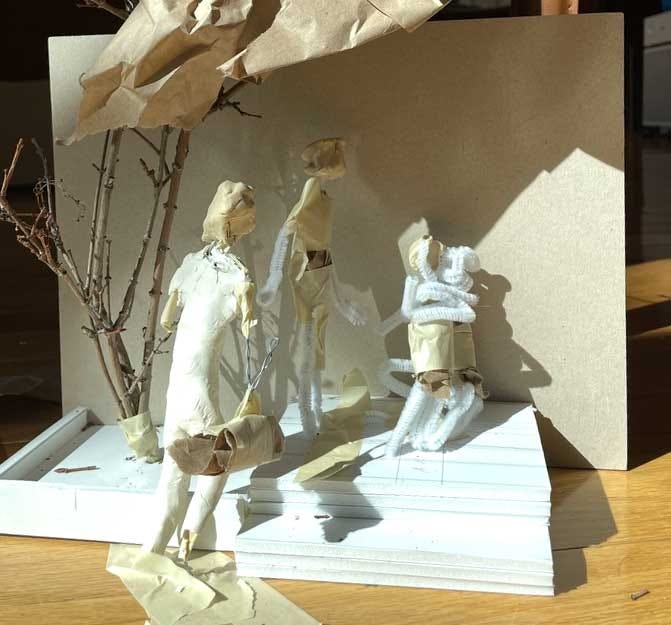
Despite this being an inarguable hot mess of pipe cleaners and masking tape, it still provided a surprising amount of information about the relative values in the areas of shadow and light and was sufficient for getting the general shape of the shadows as they stretch across the stairs and the wall. You don’t always need to make complicated, durable, or beautiful maquettes in order for them to be useful.
(I’ll share the final illustration once the book is closer to publication. It does, thankfully, look better than this.)
Maquettes can be as simple or as complex as you need them to be. Either way, they take an idea and make it tangible, and just the process of building them can get you thinking about your illustration in a deeper way. Whether they are as simple as a cardboard box or as detailed as painted sculpture, I find that they always lead to stronger work.
Do you ever build models to help with your artwork? I’d love to hear your approach!
Thanks for reading,
Jessica
I've built models for stage design, and I build puppets - but it never occurred to me to use these skills (and 1/6th scale furniture pieces I've made) for illustration modeling. Thanks for this inspiration!
That's a really great way to go about it! I usually just try and take pictures of myself doing weird poses or doing stuff with my hands. Haha.